Specula app icon

Workflow · Editing

The small fix, without booting a DAW.

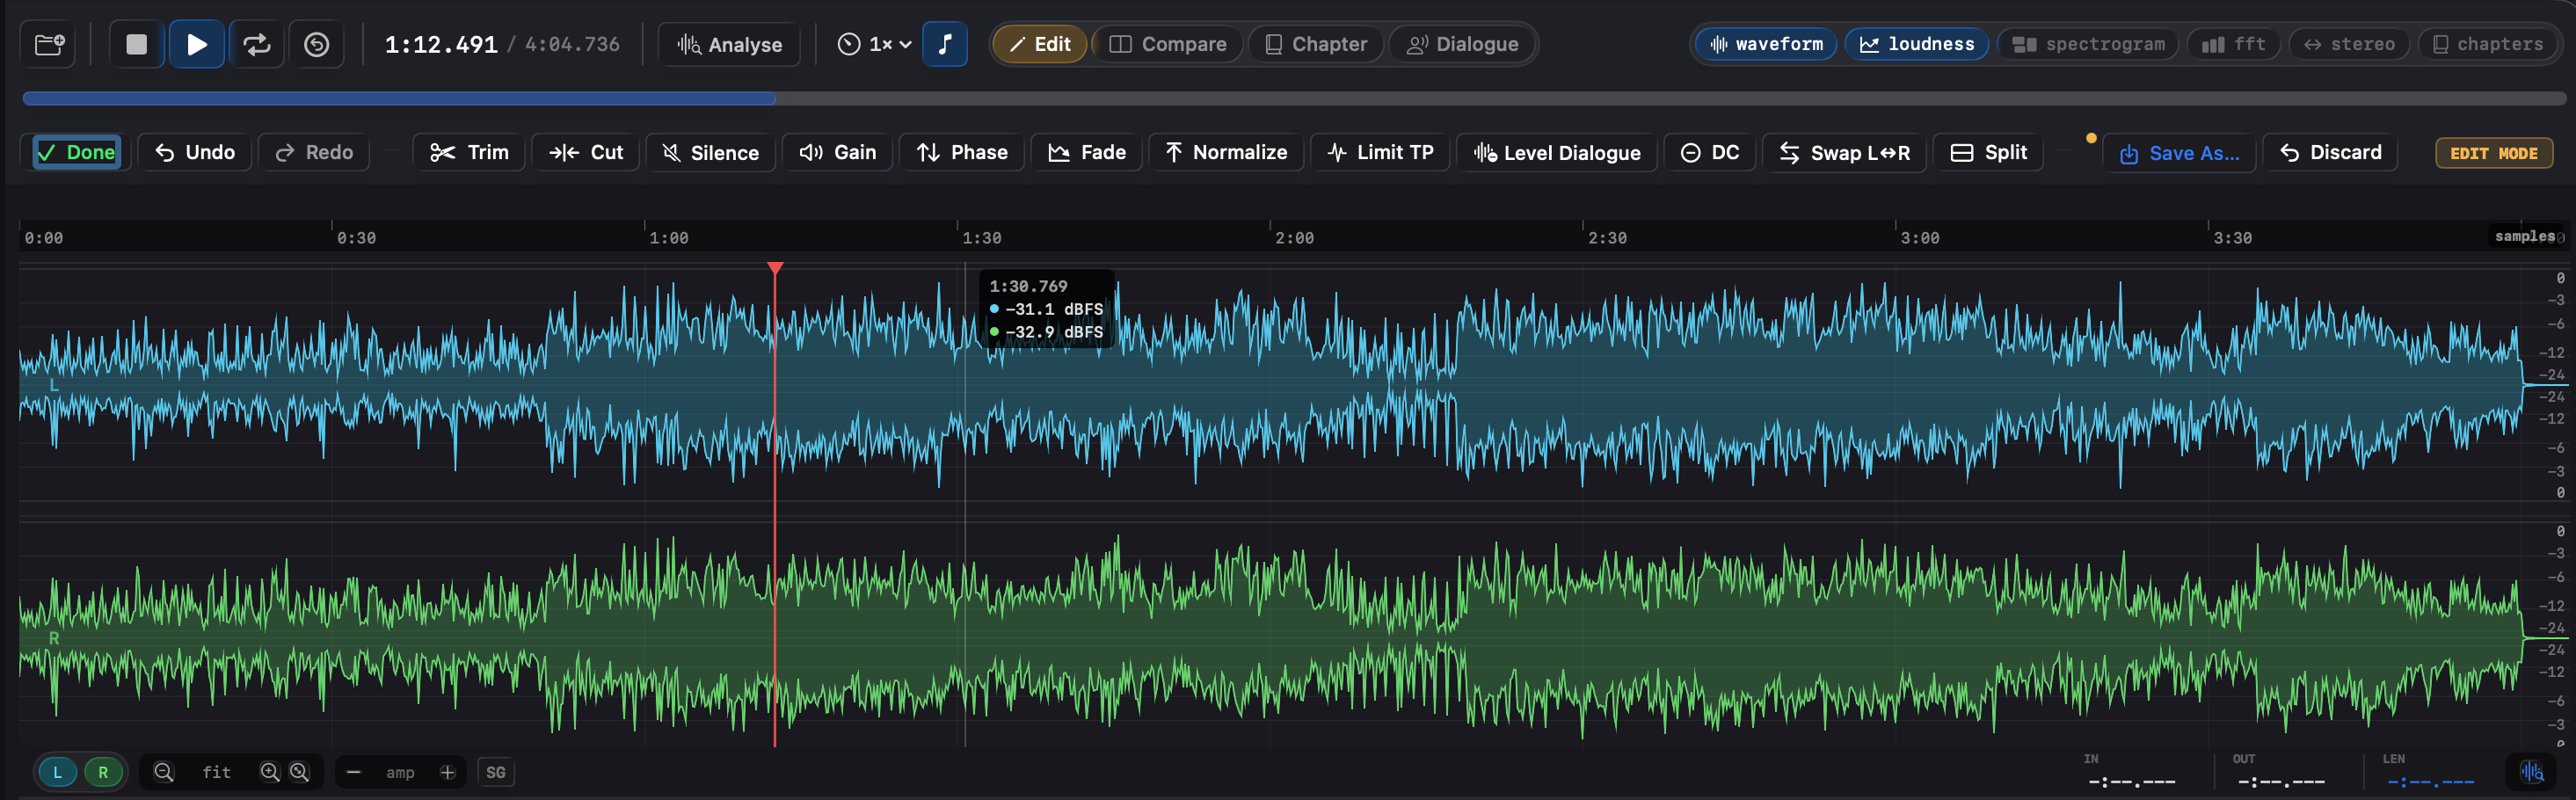
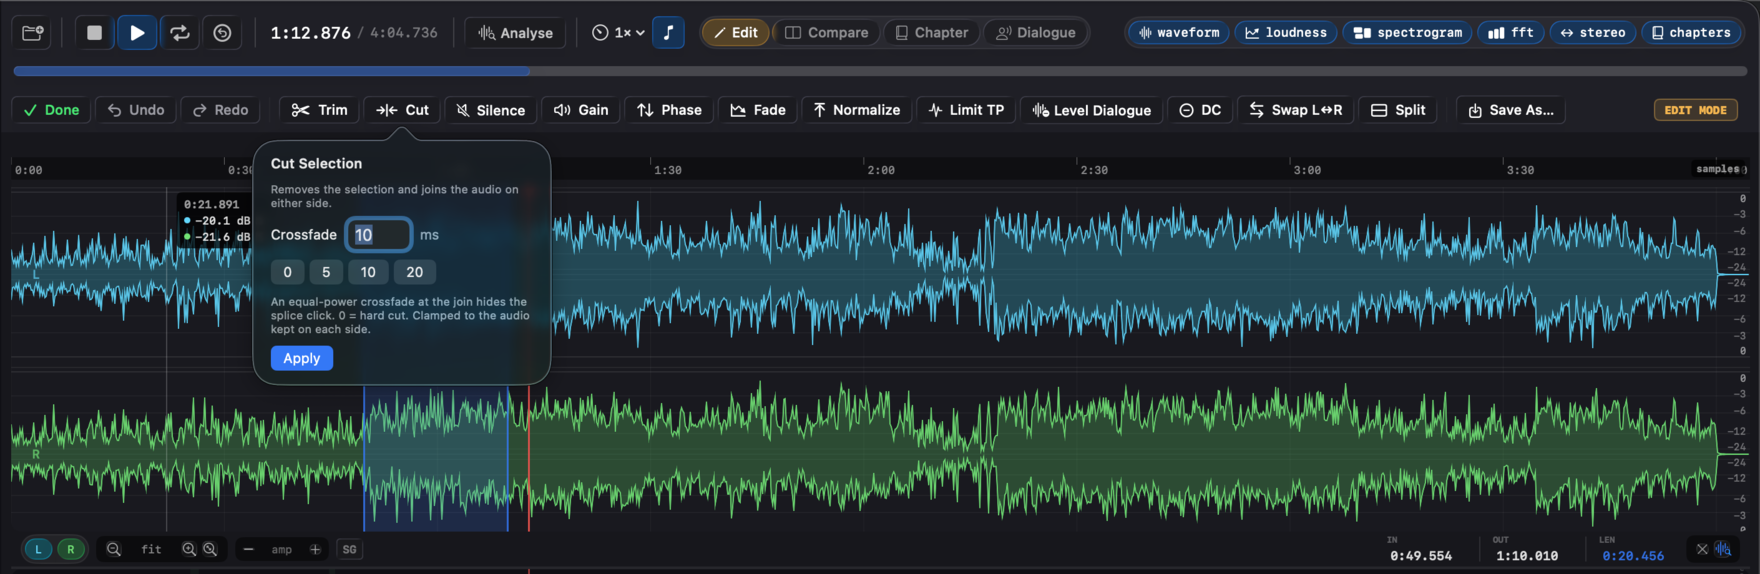
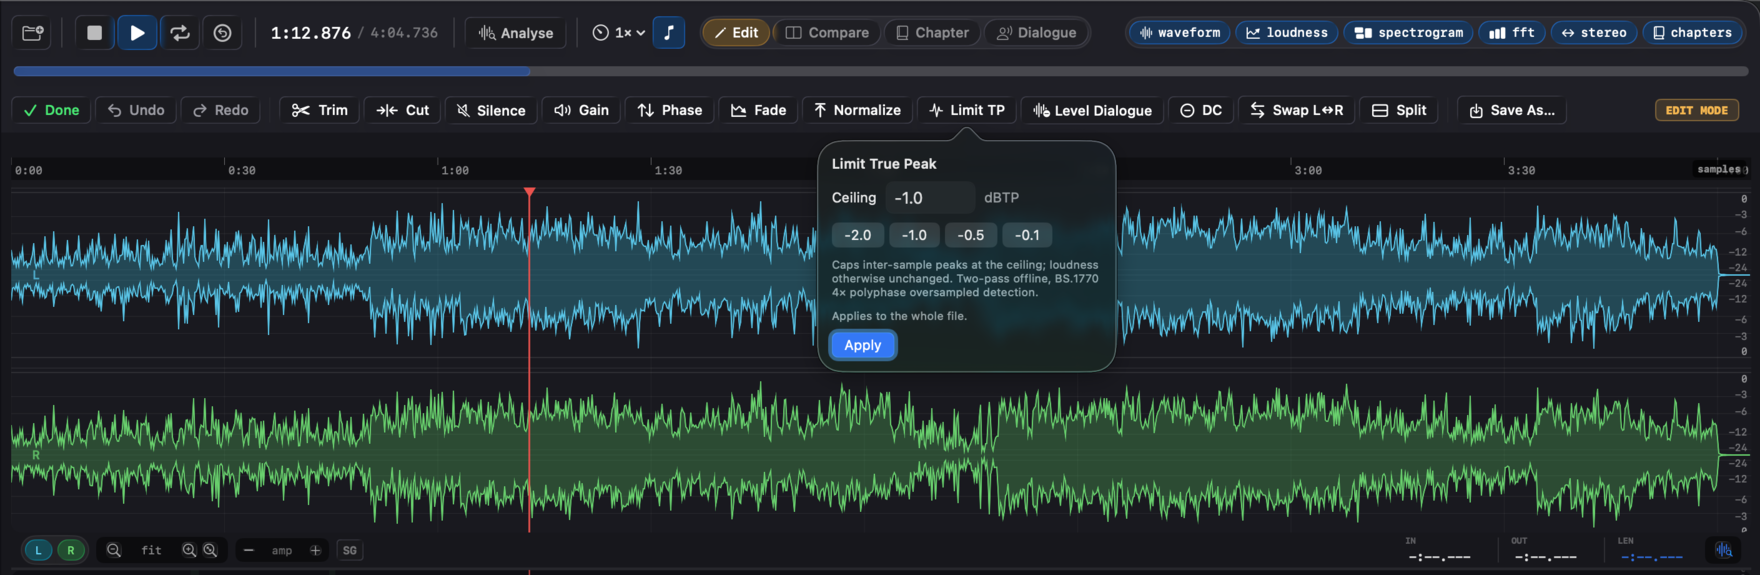
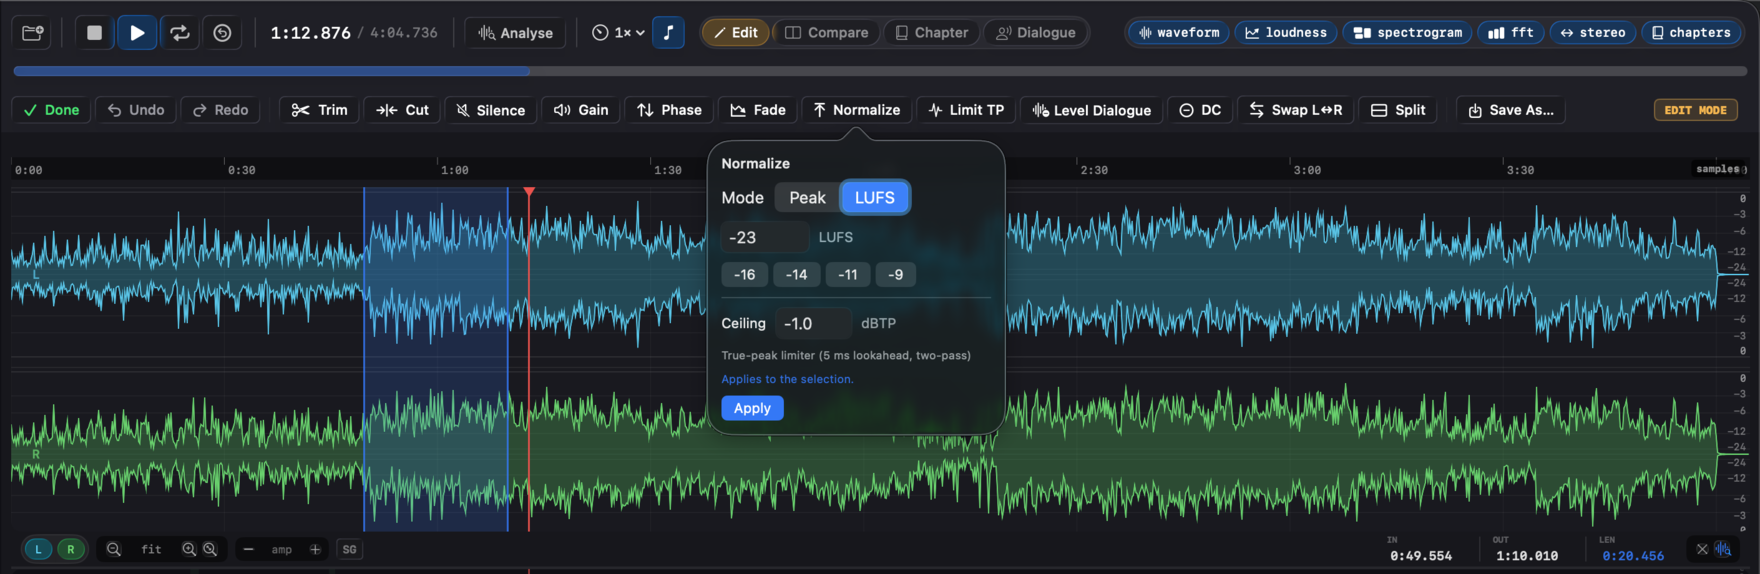
A trim. A cut out of the middle. A fade. A LUFS normalize before upload. None of that needs a session, a project file, and a render queue, and none of it should put the master at risk. Specula's Edit mode does the operation on the loaded buffer, with keyboard shortcuts, keeps up to 16 levels of undo/redo, and writes the result to a new file. The original on disk is never touched.

macOS Non-destructive Cut & Trim Normalize LUFS Keyboard shortcuts Always saves new

7-day trial · one-time purchase · macOS 14+

Specula's edit toolbar with the amber EDIT badge and operations: Trim, Cut, Gain, Silence, Fade, Normalize, Limit TP, Level Dialogue and more.
A real edit toolset. Trim, Cut, Gain, Silence, Fade, Normalize, Limit TP, and Level Dialogue, all non-destructive with 16-level undo.

When you don't need a DAW

The fix is thirty seconds of work. Opening a DAW to do it isn't.

You loaded the file to check the numbers and now you can see the one thing that needs fixing: a few seconds of room tone to trim off the head, a fade to clean up the tail, a normalize to the LUFS target the delivery wants. Round-tripping that through a DAW means a new project, an import, a bounce, and a settings dialog for each. Doing it by hand on the master means there's nothing to fall back to if you get the gain wrong.

Specula does the small jobs where the file already is. Two rules keep it safe: edits are undoable (up to 16 levels of undo/redo), and saving always produces a new file. Specula has no in-place overwrite, so the source you loaded stays exactly as it was on disk.

The workflow

Enter the mode, run the operation, save a new file. Three steps, no project.

1 · Enter Edit mode
⌘1 toggles Edit mode; the waveform shows an amber EDIT badge while it's active. Edit is mutually exclusive with Compare. The Compare controls are disabled while you're editing, and Edit is unavailable when more than one compare slot is loaded. A toolbar appears below the transport; operations that take parameters (cut, silence, gain, fade, normalize, Level Dialogue) open a small popover where you set the values and click Apply. The single-key edits are also listed in the Edit menu so the shortcuts are always visible.
2 · Apply an operation
Each operation runs on the current selection or the whole file. Trim crops to the selection (⌘T); Cut () does the opposite, removing the selection and joining the sides with an equal-power crossfade, the move for taking a too-long pause or a flubbed line out of the middle. Add Silence inserts at the playhead with no selection (say 500 ms for a video sync), or before / after / replacing a selection (in seconds or samples); Change Level applies linear gain in dB (⌃↑ / ⌃↓ for ±1 dB on a selection); Invert Phase multiplies by −1; Fade offers linear, logarithmic, and equal-power curves in and out (six total). Normalize Peak targets a dBFS value; Normalize LUFS targets a LUFS value with a ceiling, auto-applying a 5 ms-lookahead true-peak limiter when it raises loudness; both Normalize and Limit TP respect a time selection, so you can fix one hot section without re-rendering the whole file (with no selection they run on the whole file, and the popover states which). You can also reach Normalize straight from a loudness target: integrated and dialog-gated rows in the Loudness Targets panel carry a Normalize button (the up-to-line icon next to the Match toggle) that opens Edit mode with the popover pre-filled to that target, stating its Basis (Integrated LUFS or Dialog-gated LKFS) and its dBTP ceiling; a target whose true peak breaches its ceiling shows a one-click Limit TP button the same way; only the ACX RMS target has no Normalize button. Limit TP caps inter-sample peaks at a dBTP ceiling on its own. Level Dialogue ducks the room tone between speech regions and optionally lifts the dialogue to a target in one pass (the spoken-word leveler, covered below). Remove DC Offset subtracts each channel's mean; Swap Channels does a stereo L↔R swap; Split to Mono writes N mono WAV files, one per channel, to a folder you pick.
3 · Undo, or save a new file
⌘Z restores the buffer captured before the last edit, and ⇧⌘Z redoes it. Undo/redo is 16-level: each edit pushes a snapshot, so you can step back through up to 16 operations. History is disk-backed (only the current buffer stays in RAM), so deep undo doesn't balloon memory. When the result is right, ⇧⌘S opens a save panel and writes the current buffer to a new file (WAV at the file's native bit depth and sample rate by default). Specula never writes in place: Save As never overwrites the original.

The ceiling is a true-peak ceiling

A peak normalize that only watches sample values lies to you. The number that gets a master rejected, and the one streaming platforms enforce, is the inter-sample peak: the level the signal reaches once the converter reconstructs the analog waveform between samples. A file can read −1.0 dBFS on sample magnitude and still overshoot when it's played back.

Specula's limiter measures the 4× oversampled inter-sample peak and enforces the ceiling against that, in dBTP, not against the raw sample magnitude. Normalize LUFS runs it automatically whenever the normalize raises loudness, in two offline passes: pass one builds the gain envelope from the input's oversampled peaks; pass two catches any residual peaks the release stage might leave fractionally over the ceiling.

Limit TP is the same limiter on its own, no loudness measurement, no gain stage. Reach for it when the integrated LUFS is already where you want it and you only need the inter-sample peaks capped under a platform ceiling.

Edit with the keyboard

Edit mode has keyboard shortcuts, active only in Edit mode so they don't shadow the transport keys, and listed in the Edit menu so the keys are always visible. One group acts on the selection, the other at the playhead.

Cut: remove the selection and crossfade-join the sides.
⌥⌫Silence the selection (replace, keep the length).
⌘TTrim to the selection (keep it, discard the rest).
⌘F / ⌥⌘FFade In / Fade Out on the selection.
⌃↑ / ⌃↓Gain the selection +1 / −1 dB.
⌘⌫ / ⇧⌘⌫Cut to start / Cut to end, from the playhead.
⌥[ / ⌥]Fade in to / out from the playhead.
⌘Z / ⇧⌘Z / ⇧⌘SUndo (16 levels) / Redo / Save edited audio as a new file.

Level the dialogue without raising the floor

Level Dialogue is the edit for spoken word. It's a region-aware downward expander keyed to the speech regions Specula already detects (the ones you can fine-tune in Dialogue mode): it ducks the room tone between phrases with a fast attack and slow release, so word onsets and tails stay clean, no clipped starts, no chopped ends.

Tick Lift dialogue to target and it also gains the speech to a loudness target in the same pass, capping inter-sample peaks at a true-peak ceiling. Because the silence is gated first and the makeup gain goes on after, the noise floor ends up lower, not higher, which is the move a plain dialog-gated Normalize can't make (a uniform gain lifts the floor along with the voice). That's why this is the fix for the most common ACX rejection, a room-tone floor sitting just over the line.

It's a gate, not a denoiser. It rescues a marginal floor, a quiet room tone just under the gate, not a genuinely hissy recording, which still wants a better capture or a dedicated denoiser. Like every edit here, it's undoable and saves as a new file. See the audiobook and podcast workflows for where it fits.

See it in Specula

The Cut popover with a crossfade-milliseconds field and presets, with a selection active.
Cut and join. Remove a selection and crossfade the join, the opposite of Trim.
The Normalize popover set to a LUFS target with a true-peak ceiling.
Normalize to a number. Hit a peak or LUFS target; loudness moves are true-peak limited automatically.
The Limit TP popover with true-peak ceiling presets.
Cap the peaks. A lookahead true-peak limiter holds the ceiling without touching loudness.
A Normalize popover showing the 'Applies to the selection' scope hint with a time range active.
Scoped to a selection. Normalize and Limit TP can act on one passage instead of the whole file.

Fix it where the file is

Edit mode is for the jobs that don't earn a DAW session: a trim, a cut out of the middle, a fade, a normalize on a selection, a dialogue level, a channel split, a phase flip, most of them a single keystroke. Specula runs them on the loaded buffer, keeps 16 levels of undo/redo, and saves a new file every time, so the fix is fast and the master is never the thing you edited.